Gorgeous New Yarn From Wendy!!

Hello Everyone!

Sorry its been a while since my last blog.  I promise that it won’t be so long next time (I am aiming to publish a new blog every Monday from now on).  September is a very busy month in our household.  We have lots of Birthdays (everyone but me!), back to school dramas and back to University for me (which I am sooooo looking forward too).

So this weeks blog is going to be about the beautiful new colours that Wendy Yarns have just released!  I have managed to get my hands on them thanks to the lovely people at Thomas B Ramsden Yarn (you can find their website here – http://www.tbramsden.co.uk) and oh my gosh!!!  They really are LOVELY!!  I mean, lets be honest, any parcel that lands on my doorstep that contains yarn makes me squeal and these where no exception.

The first yarns that I got my excited paws on are from their Wendy Purity Merino Cotton Range. They are gorgeous pastel tones and are so soft!20170903_132642

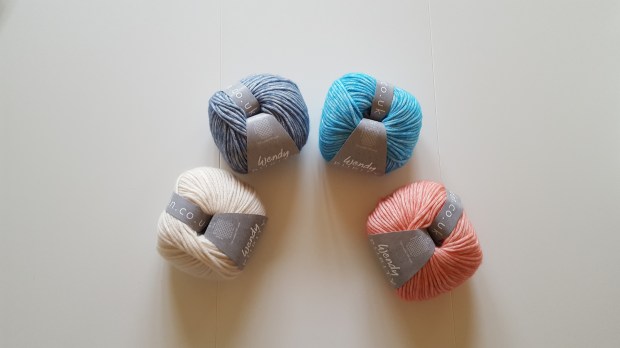
I love pastels and these lovely skeins feel so soft and luxurious.  They are made from 30% wool and 70% cotton.  They come in 50g skeins.

20170903_132852

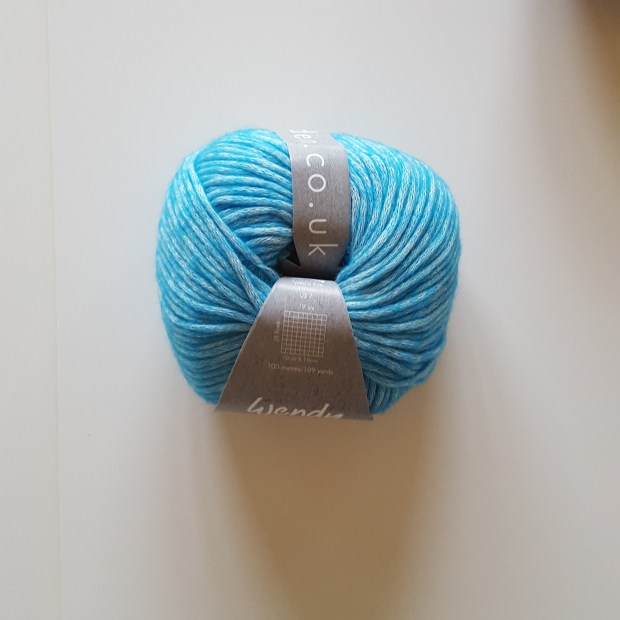
Shade 5167.  This beautiful blue is definitely my favourite colour.  As a Piscean I am always drawn to colours that remind me of the sea and this is colour is just stunning!

20170903_132842

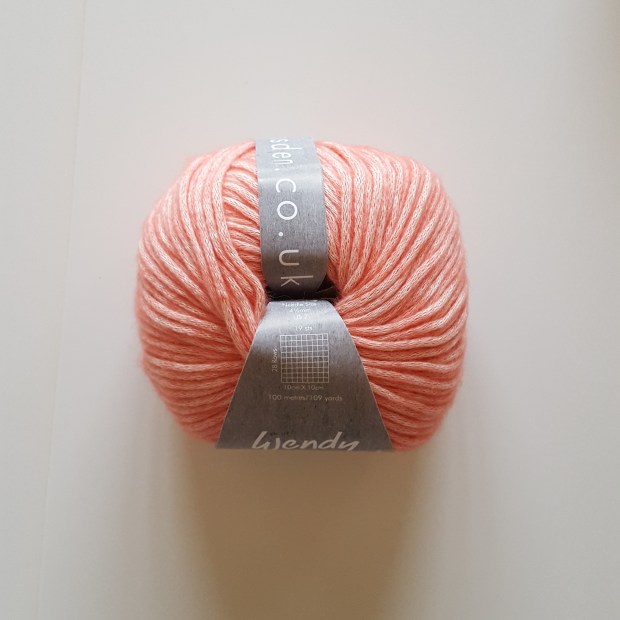
Shade 5165.  This also reminds me of the sea.  It is a beautiful shade of Coral that will go perfectly with the blue above.

20170903_132829

Shade 5160.  This shade is an amazing cream colour.

20170903_132821

Shade 5166.  This reminds me of a lovely soft Denim.

Next in my parcel of loveliness was this amazingly soft Wendy Stella Chunky and Wendy Aurora yarn.  I don’t know why, but my brain always associates  this colour way of yarn as being really rough and itchy (it must be from some awful childhood jumper that my Mum dressed me in when I was small).  Well, I can categorically report to you all that this is so not the case with these yarns.  They are beautifully soft and come in 100 gram skeins.  This yarn is 100% Acrylic and soooooooooooo soft and cuddly!!! 20170913_130429

20170903_132756

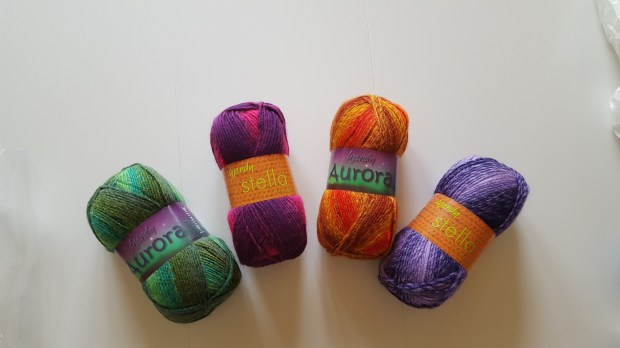
Shade 5100.  This shade incorperates all kinds of greens and light blues.  It really reminds me of the start of Autumn and the leaves beginning to turn.

20170903_132803

Shade 5187.  I love the colours in this combination.  It reminds me of fireworks on Bonfire night.

20170903_132808

Shade 5103.  This is  definitely my favourite colour of this collection.  It is just stunning and is PERFECT for Autumn.  It reminds me of Halloween and Pumpkins.  I think it would make a beautiful hat and scarf set.

20170903_132813.jpg

Shade 5187.  This shade is purples and lilacs and is just stunning.


So, what am I going to make??  I am going to make a baby beanie hat with the Wendy Purity.  I am going to use the sea blue colour and add a cream pom pom and with the Wendy Stella Chunky in shade 5187 (above), I am going to make a little baby jacket.  Check back next week and see how my making went!

Thanks for reading!  Alexandra xxxx

roses


Easy Peasy Crochet Messy Bun Hat Pattern!

20170828_140011

I know I shouldn’t even contemplate it, but soon the leaves will start to turn and fall, the days will get shorter and the nights earlier.  I am a total summer person but I must admit that I do love the winter.  Cosy nights curled up with a good book and my electric blanket on making my bed lovely and toasty is just the best thing ever.  So with cold times ahead (and in the words of Game of Thrones – Winter is coming), I thought I would have a go at designing a messy bun hat and here it is!!  Please feel free to give it a go and let me know how you get on! I have included large pictures as I know that following patterns when you are a new crocheter can be very daunting!

Instructions –

For this pattern you will need some Chunky Yarn (I used Robin Super Chunky) and a 6mm hook.  This pattern uses UK terms. This pattern is worked in 2 parts, the band part which is a ribbed effect, then the “hat” part.


Part 1 – To start make a chain of 8.

20170827_171858

Round 1 – Insert your hook into the second chain from the hook and half treble crochet (htc) in each stitch (you should have 7 htc), chain 1.

20170827_171820


Round 2 – Turn your work.  Insert your hook into the BACK LOOP ONLY (blo) of each stitch and htc into each of the 7 stitches, chain 1. Take care not to crochet into your chain 1 stitch from the end of round 1, this is a turning chain only!

20170827_172324


Round 3 – Turn your work. Hdc into blo of the next 7 stitches, chain 1.

20170827_174527

Round 4 and onwards – Turn your work. Repeat row 3 until you reach your desired length (this should be the circumference of your head!).

20170827_182530

Fold the band in half then slip stitch through both of the ends to join together.

20170828_115759

TA DA!!! Give yourself a huge big well done (and a G&T or cup of tea) as you have completed the first part of your messy bun hat!


Part 2 – Now we are going to work on the “hat” part of the project.  This is worked in a circle around one edge of the ribbed band.

Round 1 – Double crochet (dc) into each of the row ends and ridges of your band.  When you get back to the beginning, slip stitch into your starting stitch to join. Chain 1.

2017-08-28-12-50-25

20170828_121141

Round 2 – Htc in each stitch until you are back to where you started. Slip stitch to join. Chain 1.

20170828_130044

Round 3 – Htc in each stitch until you are back to where you started. Slip stitch to join. Chain 1.

20170828_131030


Rounds 4 and 5 – Repeat round 3.

20170828_132112


Round 6 – Half treble crochet 2 stitches together (htc2tog) then htc in the next 8 stitches. Repeat this until you reach the beginning of the round. Slip stitch into the first stitch from the round to join and chain 1.

20170828_132833


Round 7 – Htc2tog then htc in the next 3 stitches. Repeat this until you reach the beginning of the round. Slip stitch into the first stitch from the round to join and chain 1.


20170828_134709


Round 8 –  Htc2tog then htc in the next stitch. Repeat this until you reach the beginning of the round.  Slip stitch into the first stitch from the round to join then fasten off your work.  Don’t forget to sew your ends in (yes, its so boring I know!)!!!!

20170828_135559


YAYYYYYYYYYY!!!! You have finished your Easy Peasy Messy Bun Hat!!! I would love to see all of your creations so don’t forget to share them on our Facebook group (www.facebook.com/groups/crochetbeginnersgroup), or feel free to tag me in them on Instagram (@lexie_loves_stitching).


A big THANK YOU to the beautiful Megan Daisy for modelling! You can find Megan’s blog here – http://www.megandaisyblog.wordpress.com.

Happy Crocheting!!! Alexandra xxxx

30 Minute Crochet Beanie

A Beanie in 30 Minutes?? Yup its True!!

Unknown


So, I was wandering around that fab bargain store that is B and M and ended up (shocker!) in the yarn aisle.  Our Women’s Institute group is taking part in a local arts trail with a crafty type stall and I’m always on the look out for yarn to make lovely crochet goodies for it.  I found some chunky cable yarn and at only £2.99 for 150 grams and I thought to myself why not?!!!  The yarn is beautifully soft (80% Acrylic, 20% Wool) and I thought it would be perfect for a winter beanie.  Any excuse to crochet right?!

When I got home, as per usual when I want to Crochet something new, I hit good old you tube.  I am a total visual learner.  I cannot for the life of me follow patterns (well I can but it normally involves a lot of choice swear words and tears), so you tube is definitely my best friend when it comes to new makes.  I searched through a few dodgy beanie makes before I came across Alexis from Persia Lou.  I have made a few of Alexis’ patterns before (like the cutest bunny slippers ever) and they are always a really simple, easy quick make and I love them.  Alexis has designed a beanie pattern that only takes 30 minutes.  I thought, no way can I make a beanie in 30 minutes.  It will probably end up like when I attempt to make Jamie’s 30 minute meals and it turns into 2 hours and 30 minutes but seeing it was a miserable Sunday afternoon I thought why not, you only live once right?!

So, the pattern calls for a 19mm hook, the biggest hook in my possession is a 12mm so I just went for that and I’m glad I did because it would have turned out HUGE!  The pattern is super simple and just uses just 2 stitches; treble and double crochet (UK terms).

20170820_181047

I will warn you that it does start with the dreaded magic circle but, you can always chain 6 and slip stitch into the first chain if the magic circle is the kinda thing that you thing will break you even before you’ve started!

20170820_181016

Once you’ve conquered the beast that is the magic circle you are good to go! The beanie is worked up in only SEVEN rounds and it actually took me less than 30 minutes.  Bare in mind that I am not the quickest crocheter on planet earth so I’m sure you could actually make 2 in 30 minutes.  These are honestly super easy and would be ideal makes for Christmas pressies (dare I mention the C word) or a winter craft stall.

Here are some progress pics of the star beanie in the making!


Drum roll for the finished beanie……………………….

20170820_180819

I love it!! and its super cosy for those cold winter days!  You can find the video for the pattern here (it also includes a link to the written pattern in the description box) – 

Thanks for reading and have a lovely week!

Alexandra xxxxxx