Want to crochet the easiest ever beanie? Then look no further, I got ya!
You can find the video tutorial here –
If you prefer a written pattern then I’ve also got you covered!
*Please note that some links in this post may be affiliate links. This means that I may receive a small commission if you purchase via my link at no extra cost to yourself. This small amount allows me to keep this blog up and running.
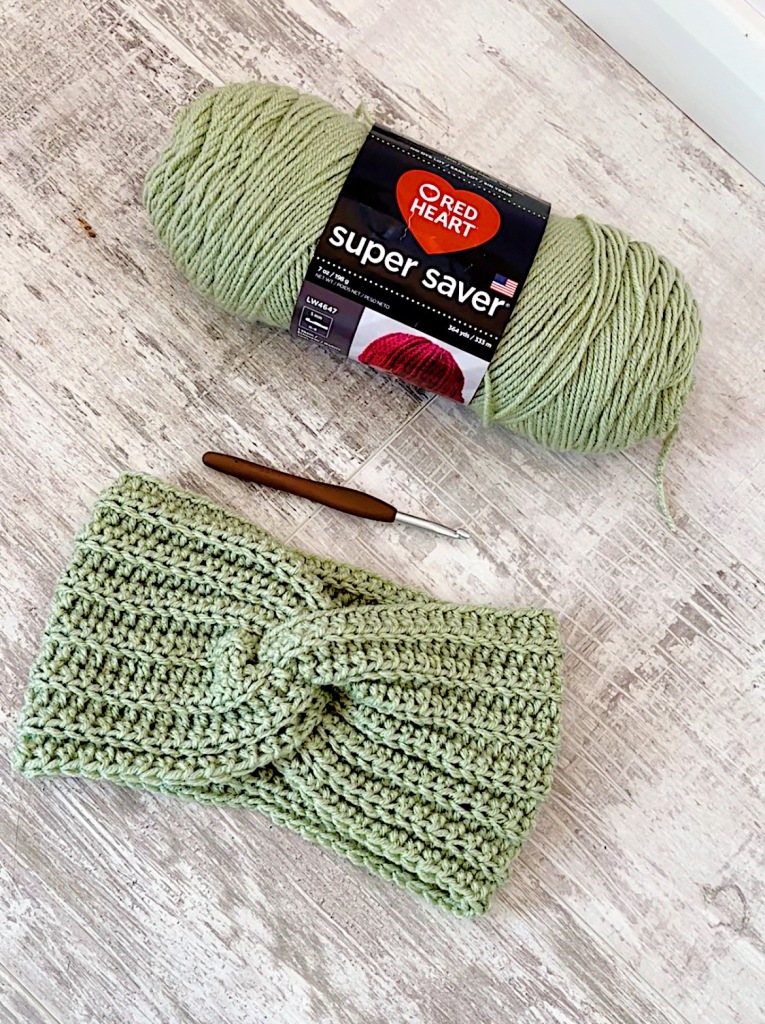
Supplies
- 5.5mm/ I crochet hook (I always use clover amour – they are the best!)
- Aran/ Size 4 yarn (I used King Cole Aran)
- Clover pom pom maker
- Darning/Tapestry needle
- Scissors
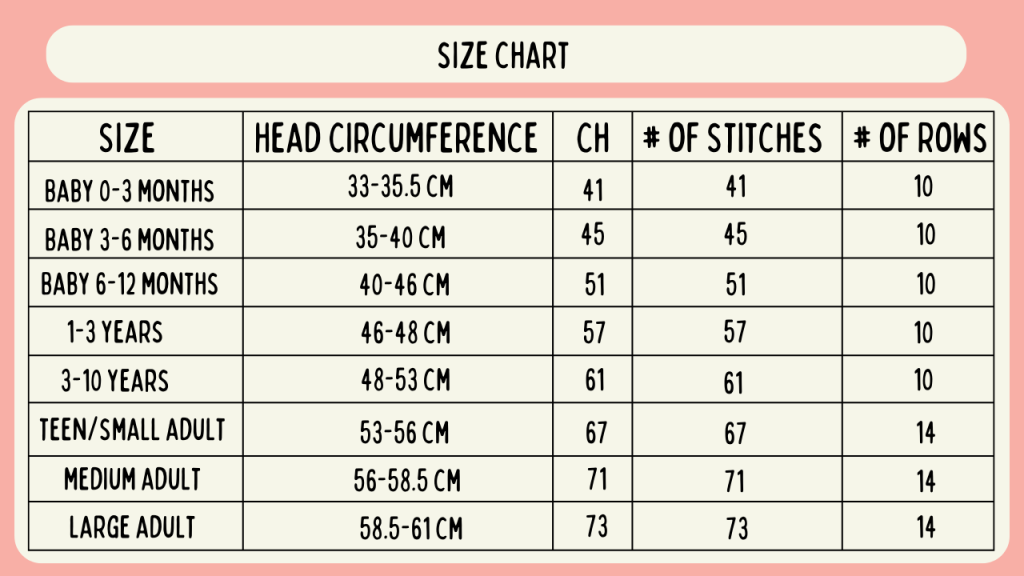
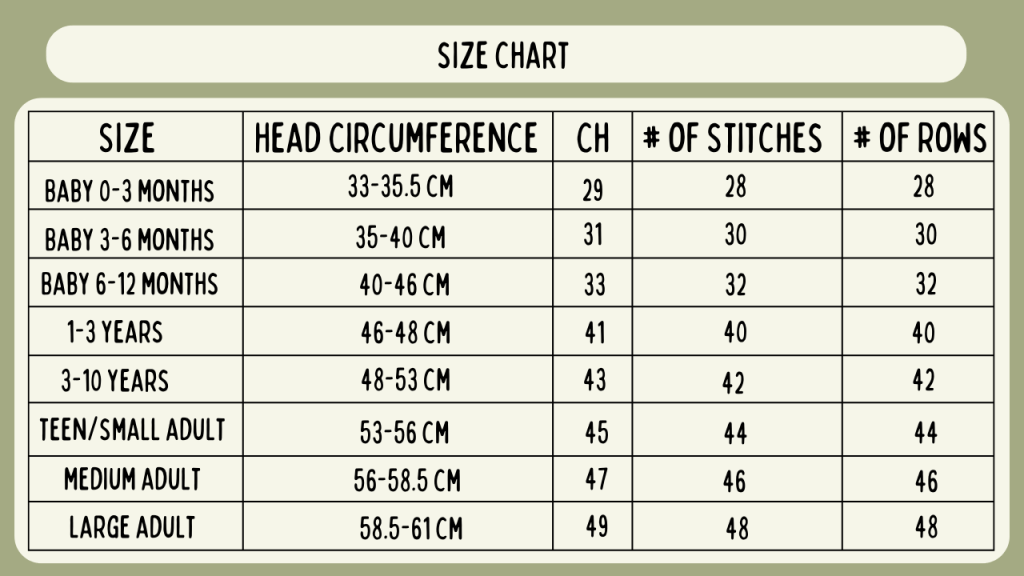
Select which size you would like to make from the chart below.
*This pattern is written in UK terms
Chain the required amount for your size
Round 1 – Half treble crochet (HTC) in the second chain from the hook and into every chain space along your chain until you reach the end.
Round 2 – Chain 1 and turn. HTC back loops only (BLO) into every stitch from the previous round.
Round 3 onwards – Chain 1 and turn. Continue to work 1 hdc blo into every stitch from the previous round until you have reached your required number of rows. Do not fasten off your yarn.
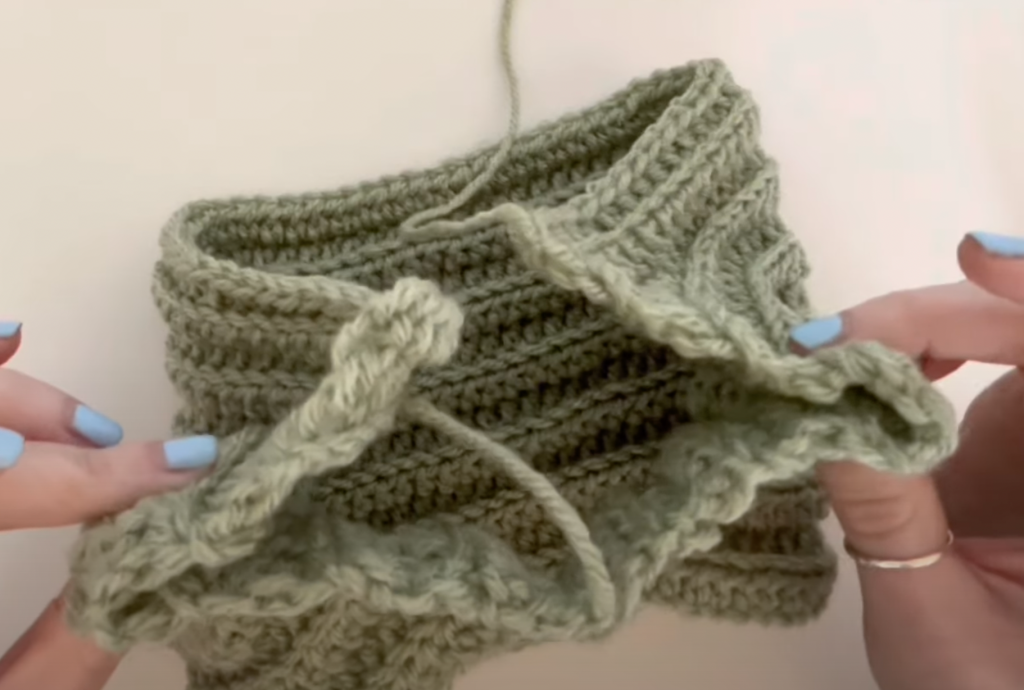
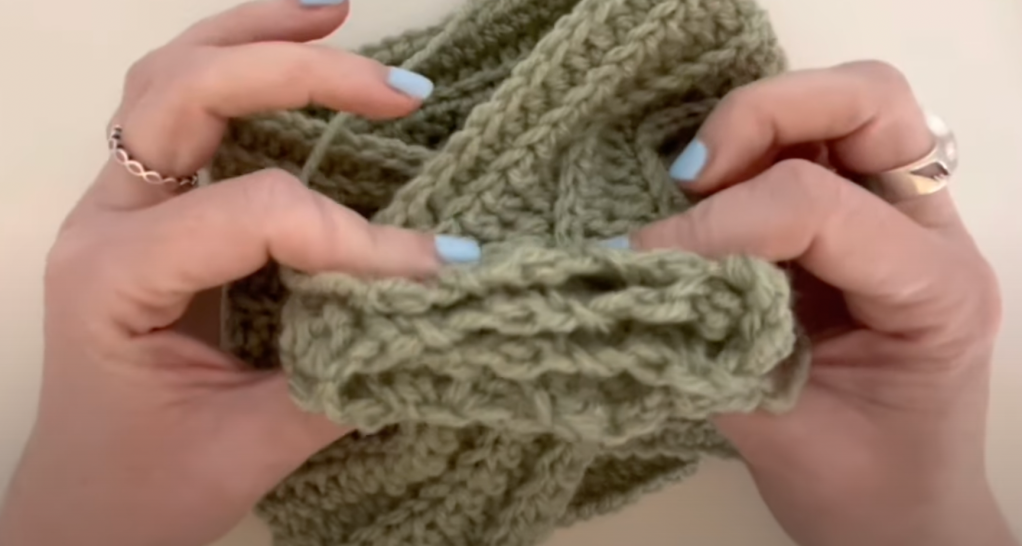
Finishing – Fold your finished panel in half. Join the panel at the shorter sides using a slip stitch to create a tube. Secure your yarn and leave a long tail as we will be using this to fasten the top of the beanie. Weave long tail end, in and out, around the top of the beanie. Pull tight to close up the top. Attach your pom pom, fold up the brim and you are done!
I love to see your creations on instagram so don’t forget to tag me – @lexie_loves_stitching