This heart is so easy and quick to make plus you can also use up any scraps of yarn that may have hanging around! It only takes around 10 minutes to make so why not make multiple and turn them into a lovely garland for valentines! You can find my easy to follow YouTube tutorial here OR you can use the written pattern below.
Supplies Needed
Any scrap yarn and corresponding hook
Stitch marker
Needle for sewing in ends
Scissors
*Please note this pattern uses UK terms
Abbreviations
st = Stitch
ss = Slip stitch
htc = Half treble crochet
tc = treble crochet
dtc – Double treble crochet
The Pattern
Round 1 – Chain 2 (does not count as stitch), 15 tc into ring, ss into top of first tc.
Round 2 – Chain 2, 1 tc into same st, 4 dtc into next st, 2 tc into next st, 1 htc into each of next four stitches.
Now we are going to make the pointy bottom of our heart – 1 tr, 1 dtr, 1 tr into next stitch.
We will now begin working up the opposite side of our heart – 1 htc into each of next 4 st’s, 2 tc into next st, 4 dtc into next st, 1 tc into next st, ch 2, sl st into same stitch.
There you have it – you have made your very own heart!!!
I love seeing all our makes so don’t forget to tag me on instagram – @lexie_loves_stitching
This pattern will teach you how to make the most simple yet pretty blanket. It only uses 2 basic stitches (double and treble crochet, UK terms) and is a 2 row repeat so is perfect if you are a beginner and want to increase your confidence in making large (or small) crochet pieces. That being said, you can make this blanket as small or as large as you would like and you can add in as many different colours of yarn that you would like. You could try stripes or even blocks of colour like I have done in my blanket. To finish off my blanket, I edged it with a crab stitch border but you can use what ever border you would like! Ready to get making? Grab your cup of tea and lets gather our supplies.
If you are more of a visual learner, you can find the video for this pattern on YouTube here –
If you are left handed don’t worry, I’ve got you!
Supplies
Any yarn of your choice and corresponding hook size
Scissors
Darning needle to weave in ends
Pattern – (This pattern uses UK terminology)
To begin, start by making a slip knot and chain to your desired width of your blanket. Make sure you end your chain on an even number.
Round 1 – Treble crochet into the second chain from the hook (tip – don’t count the chain on your hook!), double crochet into the next chain space. Continue with this sequence (tc in one space, dc in the next) until you get to the end of your row. You should end on a treble crochet. Chain 1 and turn.
Round 2 – We are going to working the opposite to the stitch that we did in round 1 so start with a dc in the first stitch and then treble in the next. Repeat this until to get to the end of the row (you should end on a dc), chain 1 and turn.
That’s it! That is the 2 row repeat that will make your blanket, I know right? SUPER easy!
If you want to add a crab stitch border, you can find my video tutorial here
Don’t forget to tag me in any of your makes on instagram – I love to see them!! @lexie_loves_stitching
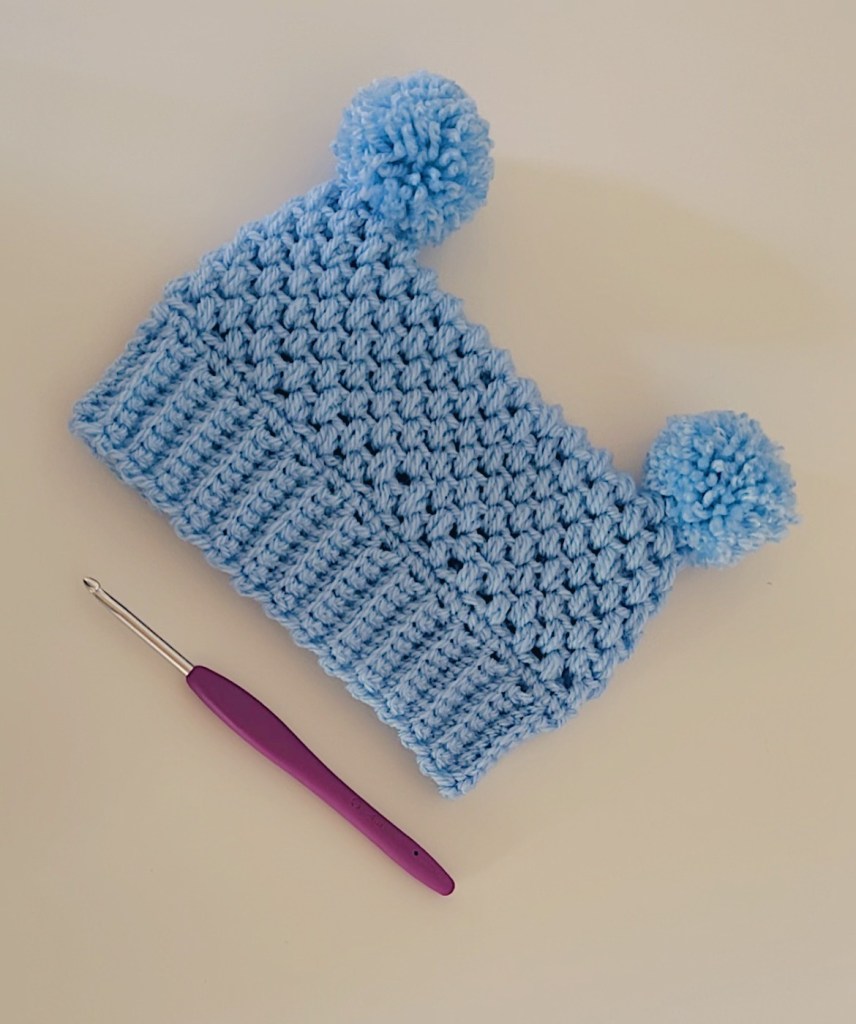
Are you more of a visual learner? Well you can find the video tutorial here.
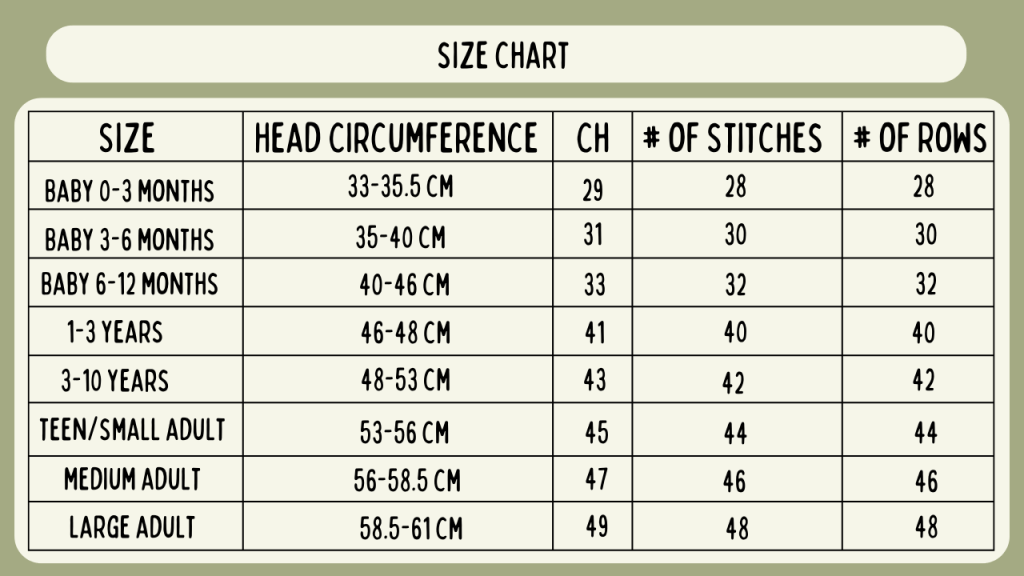
If you are more of a reader, the written pattern is below! This pattern is suitable for newborns up to adult size. There is no specific number of chains needed to make this hat – we are going on measurements. I have included a handy size chart for you to refer to if needed.
We are going to start with the bottom band part of the hat. Have a look at the size chart above to determine what size (circumference) you want your hat to be. The band part of the hat is worked in rows and then we will turn it to work the main part of the hat (if this sounds confusing then please watch the video linked above as this is more of a visual reference!).
A chain 1 does not count as a stitch when turning.
Round 1 – Chain (Ch) your brim to the WIDTH that you would like it to be. Once you have reached the desired size add 2 extra chains (for my hat, I made the newborn size and chained 7 +2, so 9 chains in total)
Round 2 – Double crochet (DC) into the second chain from the hook and then into each chain space until you reach the end of the row. Ch 1 and turn (does not count as a stitch).
Round 3 – DC into the first stitch of the round. DC into the back loop only (DCBLO) until you have 1 stitch left. Into the last stitch we are going to place a regular DC (not a DCBLO). Ch1 and turn.
Round 4 Onwards – Repeat round 3 until you reach your required circumference (see size chart above). Put the 2 ends of your work together and join with slip stitches. Do not cut your yarn. From now on we are going to be working in the round, around the brim of the band.
Main Body of the Hat
Round 1 – Chain 1 and DC back into that space. DC around the band of the hat. Keep count of your stitches as you will need to ensure that you have an even number of them when you get back to where to started. Try to keep your stitches evenly placed (I did one DC per row). Slip stitch (SS) into the first DC to join. Ch 1 (does not count as a stitch).
Round 2 – Mini bean stitch into the same space that you SS into from the previous round (a mini bean stitch is insert hook, pull up a loop, yarn over, insert hook pull up a loop (4 loops on your hook), yarn over and pull through all 4 loops). Ch1 to secure your mini bean stitch. Miss one stitch from the previous round, mini bean stitch into the next stitch. Continue this all the way around until you reach where you started from. SS into the top of the very first mini bean stitch that you made at the start of the round, chain 1. DO NOT TURN – we are working in the round.
Round 3 – From now on we are going to be working into the ch1 spaces from the previous round. *Mini bean stitch into the ch 1 space from the previous round, chain 1*. Repeat *-* until you reach where you started from. SS into the top of the very first mini bean stitch that you made at the start of the round, chain 1.
Round 4 onwards – Repeat round 3 until your hat reaches the desired height (mine measured 11 cm from brim to top). Ch 1 to secure. DO NOT CUT YARN as we are going to join up the top of the hat.
Joining the hat – Turn your hat inside out (this will give a neater finish for the end result. Place the 2 edges together and join using slip stitches in the BLO. When you reach the end fasten off and cut your yarn.
Finishing – Sew in all of your ends and turn your hat back to the proper side. Attach a pom pom in each of the 2 corners.
Ta Da!!!
Your hat is now finished! I love to see your work so don’t forget to tag me in your instagram pictures (@Lexie_Loves_Stitching).
Want to crochet the easiest ever beanie? Then look no further, I got ya!
You can find the video tutorial here –
If you prefer a written pattern then I’ve also got you covered!
*Please note that some links in this post may be affiliate links. This means that I may receive a small commission if you purchase via my link at no extra cost to yourself. This small amount allows me to keep this blog up and running.
Select which size you would like to make from the chart below.
*This pattern is written in UK terms
Chain the required amount for your size
Round 1 – Half treble crochet (HTC) in the second chain from the hook and into every chain space along your chain until you reach the end.
Round 2 – Chain 1 and turn. HTC back loops only (BLO) into every stitch from the previous round.
Round 3 onwards – Chain 1 and turn. Continue to work 1 hdc blo into every stitch from the previous round until you have reached your required number of rows. Do not fasten off your yarn.
Finishing – Fold your finished panel in half. Join the panel at the shorter sides using a slip stitch to create a tube. Secure your yarn and leave a long tail as we will be using this to fasten the top of the beanie. Weave long tail end, in and out, around the top of the beanie. Pull tight to close up the top. Attach your pom pom, fold up the brim and you are done!
I love to see your creations on instagram so don’t forget to tag me – @lexie_loves_stitching
I made this scrap yarn bookmark and posted the video on TikTok/YouTube. It has been very popular and after a request from the lovely Wanda on my YouTube for the written pattern, I have written it up! These only take about 20 minutes to make so are perfect for using up any scraps of yarn you may have hanging about!
Method(this bookmark only has one round but I have split it into sections to make it easier to follow)
Start by chaining 33 (or a multiple of 2 + 5 for a bigger/smaller bookmark)
Round 1 (right side RS) –
First Stitch –
Yarn over (YO) and insert your hook into the 2nd chain space. *YO and pull up a loop. Insert your hook into the next chain space (do not yarn over) and pull up a loop*. Repeat *-* in the next 2 chain spaces – you should have 6 loops on your hook. YO and pull through all 6 loops. Chain 1.
Next Stitch:
Insert hook into the ch-1 space of the last stitch– this is called the “eye” of the st.
YO and draw up a loop – you should have 2 loops on the hook.
Insert hook into the leg of the last stitch, YO, and draw up a loop – you should have 3 loops on the hook.
Insert hook into the ch of the last stitch, YO and draw up a loop – you should have 4 loops on the hook.
[Insert hook into next ch, YO and draw up a loop] 2 times – you should have 6 loops on the hook.
YO, and pull through all 6 loops.
Ch 1 to complete the st.
Repeat the instructions for the “Next Stitch” part of the pattern across the row. When Row 1 is complete, there should be a total of 15 stitches.
Round 2 (Wrong Side)
Turn your work and do not ch 1 to start the row. Instead, go directly into the “eye” (or ch-1 sp) of the st.
Make 2 sc into the eye of each st across.
There should be a total of 30 sc at the end of Row 2.
To finish off your bookmark, slip stitch into the the first stitch from round 1, cut off yarn and weave in ends. I have added a tassel to the bottom of my bookmark to give it a bit of pizazz!
This baby bonnet pattern is part of my baby set and is suitable for intermediate beginners. For this pattern you will need –
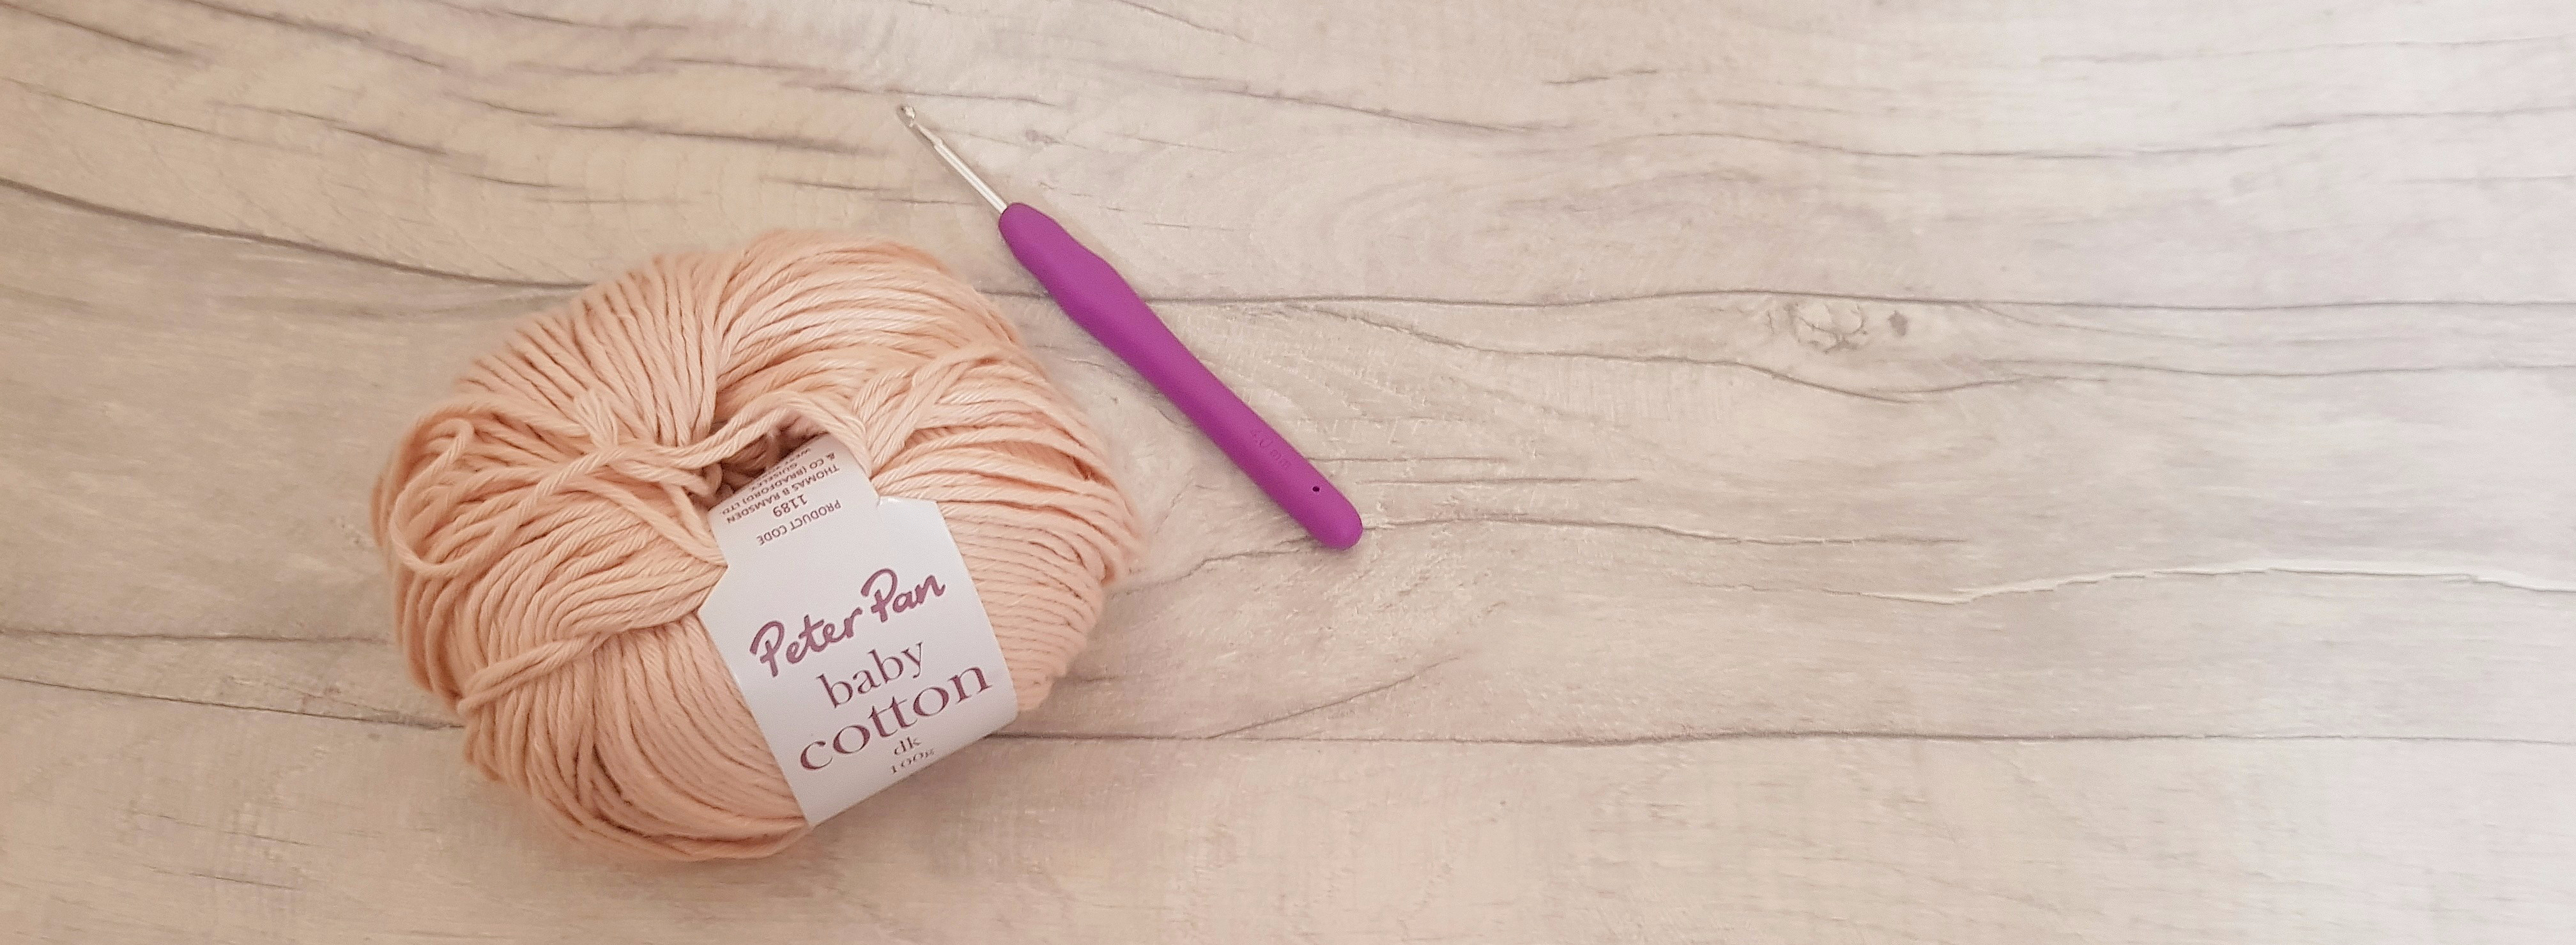
4mm Crochet Hook
DK Cotton Yarn (I used Peter Pan Baby Cotton)
Find the video here, the written pattern is below –
This pattern in written in UK Terms
Abbreviations
st/sts – Stitches
ch – chain
dc – double crochet
htc – half treble crochet
tc – treble crochet
ss – slip stitch
Start by making a magic circle or ch 4 and ss into the 1st ch
Round 1 – ch 1, work 10 tc into the magic circle, ss to join (10 st).
Round 2 – ch1, work 2tc into each stitch, ss to join (20 st).
Round 3 – ch1, work 2tc into the first st and 1 tc into the next. Repeat until the end. Ss to join (30 st).
Round 4 – ch1, work 2tc into the first st and 1 tc into the next 2 st. Repeat until the end. Ss to join (40 st).
Round 5 – ch1, work 2tc into the first st and 1 tc into the next 3 st. Repeat until the end. Ss to join (50 st).
Round 6 – ch1, work 1 tc into each st (50st).
Round 7 – ch1, 1htc, *skip 2 st, work 2tc, ch3, ss all into the same stitch*. Repeat *to* 16 times. 1htc into the last st. Turn (50 st)
Round 8 – ch1, 1htc, * work 2tc around the ch3 from the previous round, ch3, ss into the 3rd ch from the previous*. Repeat *to* 16 times. 1htc into the last st. Turn (50 st)
Round 9 – 17 – Repeat round 8. Fasten off and secure your yarn.
Strap
Chain 42 then join with a slip stitch to the main part of the bonnet. Work dc’s evenly around the bottom edge of the bonnet. When you reach the opposite edge, ch42, turn, work 1dc into each chain, along the bottom edge of the bonnet and into each of the 42 chains on the opposite side. Fasten off and sew in all your ends.
Congratulations, you have made yourself a baby bonnet!
Have you ever struggled to attach new yarn or wondered how to change colours?? Well have no fear, the magic knot is here to help you! It is so easy and simple and you will be changing colours in no time! Have a watch of the video below to see how its done!
I love to see your makes so don’t forget to tag me on Instagram – @Lexie_Loves_Stitching
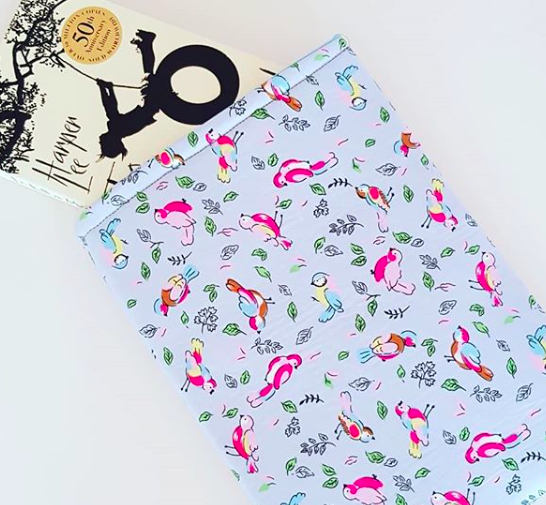
As well as making things I also love to read. I hate it when I carry my book in my bag and the front cover gets damaged and pages get creased. I have come up with a super easy pattern for a book sleeve. This project is suitable for beginner sewers and also makes an easy project for kids to have a go at.
Find the video on how too make your book sleeve here –
I love seeing your makes so don’t forget to tag me in them on Instagram @Lexie_Loves_Stitching
Its been ages since I have done a blog post! I’ve been really busy with my University course and have had loads of work to do so I haven’t been blogging as much as I should at all!
Anyway, I have come up with a really east and super quick make that even the kids can do and will soon be making lots for their friends. Find the video here –
I love to see all your makes so don’t forget to tag me in your pictures on Instagram – @Lexie_Loves_Stitching.
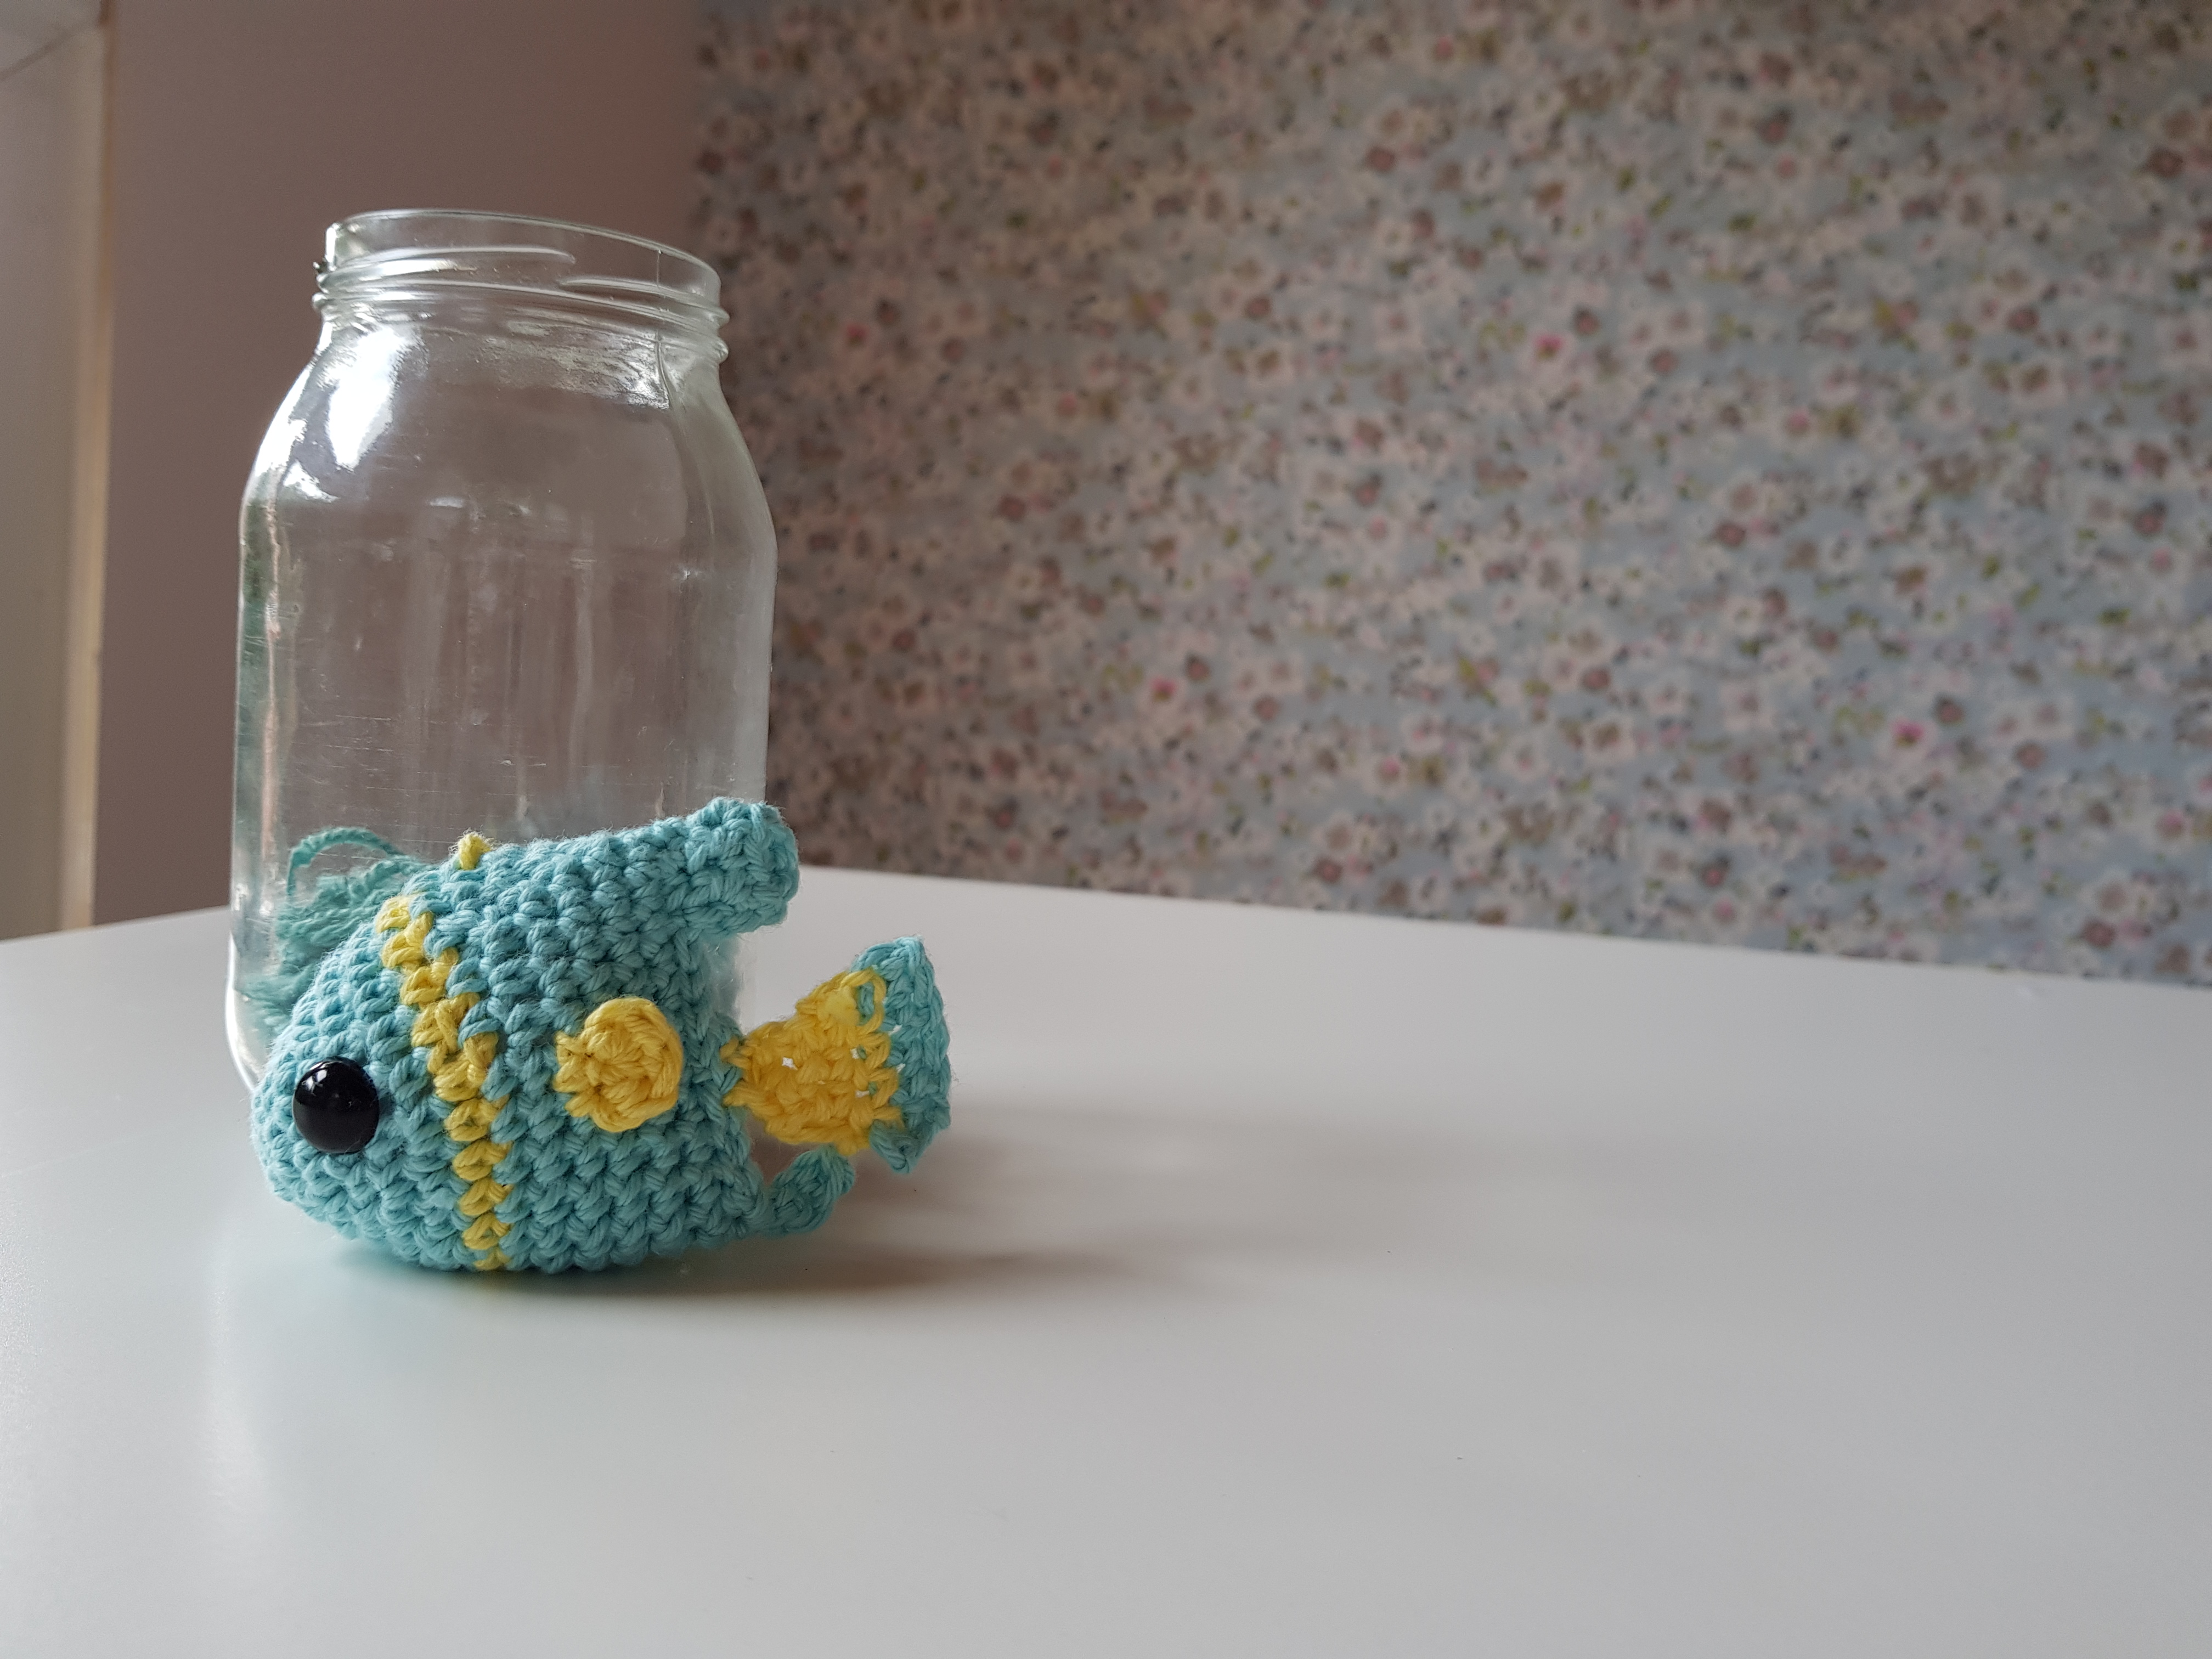
Hello Everyone and welcome to my No Fuss Fish Pattern!
This easy crochet amigurumi fish works up really easily and you can use your scraps of leftover yarn to make him. If you’re not very confident at following patterns, find my YouTube tutorial here –
To make this little chap you will need –
2 contrasting colours of DK Yarn (I used cotton DK but acrylic is fine)
A 3mm Crochet Hook
Toy Stuffing (or yarn scraps)
Safety Eyes or black yarn
A stitch marker
A darning needle
Scissors
This pattern is written in UK TERMS, do not turn your work between rounds.
Start with a Magic Circle, if you’re not sure how to do the magic circle, find a video here –
Round 1 – 6 dc into the magic circle, pull your magic circle closed,slip stitch to join to your first dc.
Round 2 – Ch1, *1dc into the first stitch, 2dc into the next* Continue * – * until the end of the round (9 Stitches).
Round 3 -Ch1, *1dc into the first 2 stitches, 2dc into the next* Continue * – * until the end of the round (12 Stitches).
Round 4 -Ch1, *1dc into the first 3 stitches, 2dc into the next* Continue * – * until the end of the round (15 Stitches).
Round 5 -Ch1, *1dc into the first 4 stitches, 2dc into the next* Continue * – * until the end of the round (18 Stitches).
Round 6 -Ch1, *1dc into the first 5 stitches, 2dc into the next* Continue * – * until the end of the round (21 Stitches).
Round 7 -Ch1, *1dc into the first 6 stitches, 2dc into the next* Continue * – * until the end of the round (24 Stitches). Fasten off yarn.
Round 8 – Attach contrasting yarn colour, 24 dc around. Fasten off yarn.
Round 9 – 17 – Attach original yarn colour, *24 dc around, slip stitch into the 1st stitch of the round, chain 1*. Repeat * – * for each round.
Its now time to stuff your fish and attach his safety eyes (see video above for best placement of eyes).
Round 18 – Skip 8 stitches, slip stitch into 9th stitch. Slip Stitch through both sides of your fish to close the gap (see video above if you need help). When you have closed the space fully, chain 4, skip the first chain and dc into the next 3 chain spaces, slip stitch into the next stitch (on the main body of the fish). Fasten off and cut your yarn.
Round 19 – Attach your yarn, dc2tog, dc in the next 2 stitches, dc2tog. Ch1 and turn. 1dc in each stitch around, slip stitch through both sides of your work to close (see video). Fasten off and cut your yarn.
Fins (Make 2) – Start with a magic circle. 1dc into the middle of the circle, 1htc, 1tc, 1htc, 1dc. Fasten off and pull your circle closed.
Tail – With main colour yarn, chain 7. 1dc in each stitch starting from the second chain from the hook. Tie off and cut your yarn. Attach your contrast colour, 1dc2tog, 1dc in the next 2 stitches, 1dc2tog in last 2 stitches, ch1, turn. 1dc in each stitch (4 stitches), ch1, turn, 1dc2tog, 1dc2tog (2 stitches), ch1, turn, 1dc in each to the 2 stitches, fasten off and secure your yarn.
Now sew all your parts together and you have made your fish!
Fill a large jar with gravel and decorate as you wish. Attach some thread to the top of your fish and glue the thread to the inside of the lid. When the glue is dry, pop the lid on and your fish will be ready to swim in his new home!!!