Baby Bonnet Pattern

IMG_20190217_134339_674.jpg


Hello Everyone,

This baby bonnet pattern is part of my baby set and is suitable for intermediate beginners.  For this pattern you will need –
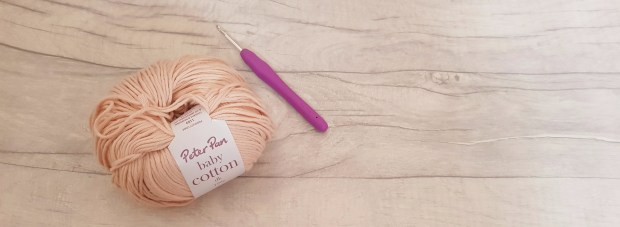
  • 4mm Crochet Hook
  • DK Cotton Yarn (I used Peter Pan Baby Cotton)

Processed with VSCO with  preset

Find the video here, the written pattern is below –

This pattern in written in UK Terms

Abbreviations

  • st/sts – Stitches
  • ch – chain
  • dc – double crochet
  • htc – half treble crochet
  • tc – treble crochet
  • ss – slip stitch

Start by making a magic circle or ch 4 and ss into the 1st ch

Round 1 – ch 1, work 10 tc into the magic circle, ss to join (10 st).

Round 2 – ch1, work 2tc into each stitch, ss to join (20 st).

Round 3 – ch1, work 2tc into the first st and 1 tc into the next. Repeat until the end. Ss to join (30 st).

Round 4 – ch1, work 2tc into the first st and 1 tc into the next 2 st. Repeat until the end. Ss to join (40 st).

Round 5 – ch1, work 2tc into the first st and 1 tc into the next 3 st. Repeat until the end. Ss to join (50 st).

Round 6 – ch1, work 1 tc into each st (50st).

Round 7 – ch1, 1htc, *skip 2 st, work 2tc, ch3, ss all into the same stitch*. Repeat *to* 16 times. 1htc into the last st. Turn (50 st)

Round 8 – ch1, 1htc, * work 2tc around the ch3 from the previous round, ch3, ss into the 3rd ch from the previous*. Repeat *to* 16 times. 1htc into the last st. Turn (50 st)

Round 9 – 17 – Repeat round 8. Fasten off and secure your yarn.

Strap

Chain 42 then join with a slip stitch to the main part of the bonnet. Work dc’s evenly around the bottom edge of the bonnet. When you reach the opposite edge, ch42, turn, work 1dc into each chain, along the bottom edge of the bonnet and into each of the 42 chains on the opposite side. Fasten off and sew in all your ends.

IMG_20190217_134339_670.jpg

Congratulations, you have made yourself a baby bonnet!

Happy Crocheting!

Screen Shot 2017-10-17 at 16.08.44


Advertisement

Sew a Book Sleeve

Hello Everyone

As well as making things I also love to read.  I hate it when I carry my book in my bag and the front cover gets damaged and pages get creased.  I have come up with a super easy pattern for a book sleeve.  This project is suitable for beginner sewers and also makes an easy project for kids to have a go at.

Screen Shot 2018-10-10 at 14.13.38


Find the video on how too make your book sleeve here –


I love seeing your makes so don’t forget to tag me in them on Instagram @Lexie_Loves_Stitching

Happy Sewing!

Screen Shot 2017-10-17 at 16.08.44

Easy Crochet Friendship Bracelet

Hi Everyone!

Its been ages since I have done a blog post! I’ve been really busy with my University course and have had loads of work to do so I haven’t been blogging as much as I should at all!

Anyway, I have come up with a really east and super quick make that even the kids can do and will soon be making lots for their friends.  Find the video here –

I love to see all your makes so don’t forget to tag me in your pictures on Instagram – @Lexie_Loves_Stitching.

Take care and happy crocheting!

Screen Shot 2017-10-17 at 16.08.44

No Fuss Fish Pattern

20180730_160217

Hello Everyone and welcome to my No Fuss Fish Pattern!

This easy crochet amigurumi fish works up really easily and you can use your scraps of leftover yarn to make him.  If you’re not very confident at following patterns, find my YouTube tutorial here –


To make this little chap you will need –

  • 2 contrasting colours of DK Yarn (I used cotton DK but acrylic is fine)
  • A 3mm Crochet Hook
  • Toy Stuffing (or yarn scraps)
  • Safety Eyes or black yarn
  • A stitch marker
  • A darning needle
  • Scissors

This pattern is written in UK TERMS, do not turn your work between rounds.

Start with a Magic Circle, if you’re not sure how to do the magic circle, find a video here –

Round 1 – 6 dc into the magic circle, pull your magic circle closed,slip stitch to join to your first dc.

Round 2 – Ch1, *1dc into the first stitch, 2dc into the next* Continue * – * until the end of the round (9 Stitches).

Round 3 -Ch1, *1dc into the first 2 stitches, 2dc into the next* Continue * – * until the end of the round (12 Stitches).

Round 4 -Ch1, *1dc into the first 3 stitches, 2dc into the next* Continue * – * until the end of the round (15 Stitches).

Round 5 -Ch1, *1dc into the first 4 stitches, 2dc into the next* Continue * – * until the end of the round (18 Stitches).

Round 6 -Ch1, *1dc into the first 5 stitches, 2dc into the next* Continue * – * until the end of the round (21 Stitches).

Round 7 -Ch1, *1dc into the first 6 stitches, 2dc into the next* Continue * – * until the end of the round (24 Stitches). Fasten off yarn.

Round 8  – Attach contrasting yarn colour, 24 dc around. Fasten off yarn.

Round 9 – 17 –  Attach original yarn colour, *24 dc around, slip stitch into the 1st stitch of the round, chain 1*. Repeat * – * for each round.

Its now time to stuff your fish and attach his safety eyes (see video above for best placement of eyes).

Round 18 – Skip 8 stitches, slip stitch into 9th stitch. Slip Stitch through both sides of your fish to close the gap (see video above if you need help). When you have closed the space fully, chain 4, skip the first chain and dc into the next 3 chain spaces, slip stitch into the next stitch (on the main body of the fish). Fasten off and cut your yarn.

Round 19 – Attach your yarn, dc2tog, dc in the next 2 stitches, dc2tog. Ch1 and turn. 1dc in each stitch around, slip stitch through both sides of your work to close (see video). Fasten off and cut your yarn.

Fins (Make 2) – Start with a magic circle. 1dc into the middle of the circle, 1htc, 1tc, 1htc, 1dc. Fasten off and pull your circle closed.

Tail – With main colour yarn, chain 7. 1dc in each stitch starting from the second chain from the hook. Tie off and cut your yarn.  Attach your contrast colour, 1dc2tog, 1dc in the next 2 stitches, 1dc2tog in last 2 stitches, ch1, turn. 1dc in each stitch (4 stitches), ch1, turn, 1dc2tog, 1dc2tog (2 stitches), ch1, turn, 1dc in each to the 2 stitches, fasten off and secure your yarn.

Now sew all your parts together and you have made your fish!

Fill a large jar with gravel and decorate as you wish.  Attach some thread to the top of your fish and glue the thread to the inside of the lid.  When the glue is dry, pop the lid on and your fish will be ready to swim in his new home!!!

I hope you enjoyed this tutorial

Happy Crocheting

Screen Shot 2017-10-17 at 16.08.44